最新下载
热门教程
- 1
- 2
- 3
- 4
- 5
- 6
- 7
- 8
- 9
- 10
Android仿微信之界面导航篇(1)
时间:2022-06-25 23:01:34 编辑:袖梨 来源:一聚教程网
微信是现在比较流行的应用了,在各大安卓市场几乎都是名列前茅了。
说实话不得不羡慕腾讯庞大的用户群体,只要腾讯敢做,就会有很多人去用。
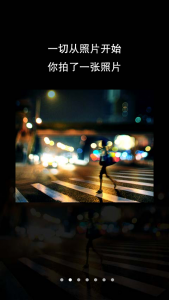
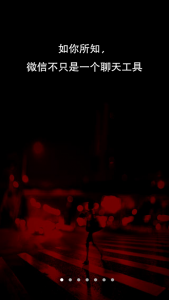
废话不多说,下面就开始说一下如何实现微信的第一次启动程序的用户导航,ViewPager相信大家都不陌生了,是google放出的一个安卓低版本的兼容包android-support-v4.jar,里面有很多类我们可以去使用。那这个导航就是使用这个类来辅助完成的,在每一个View里放置一个图片,当我们使用ViewPager滑动界面的时候,就会看到一张张图片,从而实现这个效果,我们来看一下官方的:
其实使用过微信的用户都知道,每次启动程序都会有这个启动画面,如果是第一次使用当然还会出现后面的导航界面。下面以第一次使用为例,来说明如何实现。当启动出现进入第一个Activity,其实就是那个启动画面,有地球那个,之后会在这个Activity里面设置一个Handler去延迟(1秒,数值可以自己设定)执行启动导航界面的Activity,代码如下:
import android.os.Bundle;
import android.os.Handler;
import android.app.Activity;
import android.content.Intent;
import android.view.Window;
import android.view.WindowManager;

public class Appstart extends Activity{

 /*
 * 2012.11.1
 * @author:wangjinyu501
 * 这个Activiyt是程序启动画面,也就是一个图片。在这个Activity里使用了Handler一秒后会进入到引导Activity里面。
 */
 @Override
 public void onCreate(Bundle savedInstanceState) {

 super.onCreate(savedInstanceState);
 requestWindowFeature(Window.FEATURE_NO_TITLE);//去掉标题栏,注意一定要在绘制view之前调用这个方法,不然会出现
 //AndroidRuntimeException: requestFeature() must be called before adding content 这个错误。
 setContentView(R.layout.appstart);
 getWindow().setFlags(WindowManager.LayoutParams.FLAG_FULLSCREEN,WindowManager.LayoutParams.FLAG_FULLSCREEN); //全屏显示

 new Handler().postDelayed(new Runnable(){
 public void run(){
 Intent intent = new Intent (Appstart.this,Viewpager.class);
 startActivity(intent);
 this.finish();//结束本Activity
 }
 }, 1000);
 }
}
之后就进入前面说的导航页面了,其实就是多个View,每一个View就是一张图片,非常简单,而且就是基于ViewPager实现的,唯一有一些难度的就是当我们滑动图片的时候,下面那些移动的小圆点会随着改变。这种效果在其他程序的导航界面中也是很常见的。代码如下:
import java.util.ArrayList;
import android.app.Activity;
import android.content.Intent;
import android.os.Bundle;
import android.support.v4.view.PagerAdapter;
import android.support.v4.view.PagerTitleStrip;
import android.support.v4.view.ViewPager;
import android.support.v4.view.ViewPager.OnPageChangeListener;
import android.view.LayoutInflater;
import android.view.View;
import android.view.animation.Animation;
import android.view.animation.TranslateAnimation;
import android.widget.ImageView;


public class Viewpager extends Activity {

 private ViewPager mViewPager;//声明ViewPager对象
 private PagerTitleStrip mPagerTitleStrip;//声明动画标题
 private ImageView mPageImg;// 动画图片
 private int currIndex = 0;//当前页面
 private ImageView mPage0,mPage1,mPage2,mPage3,mPage4,mPage5,mPage6,mPage7,mPage8;//声明导航图片对象

 @Override
 public void onCreate(Bundle savedInstanceState) {
 super.onCreate(savedInstanceState);
 setContentView(R.layout.viewpager);
 mViewPager = (ViewPager)findViewById(R.id.viewpager);
 mViewPager.setOnPageChangeListener(new MyOnPageChangeListener());
 mPagerTitleStrip = (PagerTitleStrip)findViewById(R.id.pagertitle);

 mPage0 = (ImageView)findViewById(R.id.page0);
 mPage1 = (ImageView)findViewById(R.id.page1);
 mPage2 = (ImageView)findViewById(R.id.page2);
 mPage3 = (ImageView)findViewById(R.id.page3);
 mPage4 = (ImageView)findViewById(R.id.page4);
 mPage5 = (ImageView)findViewById(R.id.page5);
 mPage6 = (ImageView)findViewById(R.id.page6);
 mPage7 = (ImageView)findViewById(R.id.page7);
 mPage8 = (ImageView)findViewById(R.id.page8);

 //将要分页显示的View装入数组中
 LayoutInflater mLi = LayoutInflater.from(this);
 View view1 = mLi.inflate(R.layout.view1, null);
 View view2 = mLi.inflate(R.layout.view2, null);
 View view3 = mLi.inflate(R.layout.view3, null);
 View view4 = mLi.inflate(R.layout.view4, null);
 View view5 = mLi.inflate(R.layout.view5, null);
 View view6 = mLi.inflate(R.layout.view6, null);
 View view7 = mLi.inflate(R.layout.view7, null);
 View view8 = mLi.inflate(R.layout.view8, null);
 View view9 = mLi.inflate(R.layout.view9, null);

 //每个页面的view数据
 final ArrayList views = new ArrayList();
 views.add(view1);
 views.add(view2);
 views.add(view3);
 views.add(view4);
 views.add(view5);
 views.add(view6);
 views.add(view7);
 views.add(view8);
 views.add(view9);
 //每一个也没得标题
 final ArrayList titles = new ArrayList();
 titles.add("①");
 titles.add("②");
 titles.add("③");
 titles.add("④");
 titles.add("⑤");
 titles.add("⑥");
 titles.add("⑦");
 titles.add("⑧");
 titles.add("⑨");

 //填充ViewPager的数据适配器,我们重写即可
 PagerAdapter mPagerAdapter = new PagerAdapter() {

 @Override
 public boolean isViewFromObject(View arg0, Object arg1) {
 return arg0 == arg1;
 }

 @Override
 public int getCount() {
 return views.size();
 }

 @Override
 public void destroyItem(View container, int position, Object object) {
 ((ViewPager)container).removeView(views.get(position));
 }

 @Override
 public CharSequence getPageTitle(int position) {
 return titles.get(position);
 }

 @Override
 public Object instantiateItem(View container, int position) {
 ((ViewPager)container).addView(views.get(position));
 return views.get(position);
 }
 };

 mViewPager.setAdapter(mPagerAdapter);//与ListView用法相同,设置重写的Adapter。这样就实现了ViewPager的滑动效果。
 }

 public class MyOnPageChangeListener implements OnPageChangeListener {

 public void onPageSelected(int arg0) {//参数arg0为选中的View

 Animation animation = null;//声明动画对象
 switch (arg0) {
 case 0: //页面一
 mPage0.setImageDrawable(getResources().getDrawable(R.drawable.page_now));//进入第一个导航页面,小圆点为选中状态,下一个页面的小圆点是未选中状态。
 mPage1.setImageDrawable(getResources().getDrawable(R.drawable.page));
 if (currIndex == arg0+1) {
  animation = new TranslateAnimation(arg0+1, arg0, 0, 0);//圆点移动效果动画,从当前View移动到下一个View
 }
 break;
 case 1: //页面二
 mPage1.setImageDrawable(getResources().getDrawable(R.drawable.page_now));//当前View
 mPage0.setImageDrawable(getResources().getDrawable(R.drawable.page));//上一个View
 mPage2.setImageDrawable(getResources().getDrawable(R.drawable.page));//下一个View
 if (currIndex == arg0-1) {//如果滑动到上一个View
  animation = new TranslateAnimation(arg0-1, arg0, 0, 0); //圆点移动效果动画,从当前View移动到下一个View


 } else if (currIndex == arg0+1) {//圆点移动效果动画,从当前View移动到下一个View,下同。

  animation = new TranslateAnimation(arg0+1, arg0, 0, 0);
 }
 break;
 case 2: //页面三
 mPage2.setImageDrawable(getResources().getDrawable(R.drawable.page_now));
 mPage1.setImageDrawable(getResources().getDrawable(R.drawable.page));
 mPage3.setImageDrawable(getResources().getDrawable(R.drawable.page));
 if (currIndex == arg0-1) {
  animation = new TranslateAnimation(arg0-1, arg0, 0, 0);
 } else if (currIndex == arg0+1) {
  animation = new TranslateAnimation(arg0+1, arg0, 0, 0);
 }
 break;
 case 3:
 mPage3.setImageDrawable(getResources().getDrawable(R.drawable.page_now));
 mPage4.setImageDrawable(getResources().getDrawable(R.drawable.page));
 mPage2.setImageDrawable(getResources().getDrawable(R.drawable.page));
 if (currIndex == arg0-1) {
  animation = new TranslateAnimation(arg0-1, arg0, 0, 0);

 } else if (currIndex == arg0+1) {
  animation = new TranslateAnimation(arg0+1, arg0, 0, 0);
 }
 break;
 case 4:
 mPage4.setImageDrawable(getResources().getDrawable(R.drawable.page_now));
 mPage3.setImageDrawable(getResources().getDrawable(R.drawable.page));
 mPage5.setImageDrawable(getResources().getDrawable(R.drawable.page));
 if (currIndex == arg0-1) {
  animation = new TranslateAnimation(arg0-1, arg0, 0, 0);
 } else if (currIndex == arg0+1) {
  animation = new TranslateAnimation(arg0+1, arg0, 0, 0);
 }
 break;
 case 5:
 mPage5.setImageDrawable(getResources().getDrawable(R.drawable.page_now));
 mPage4.setImageDrawable(getResources().getDrawable(R.drawable.page));
 mPage6.setImageDrawable(getResources().getDrawable(R.drawable.page));
 if (currIndex == arg0-1) {
  animation = new TranslateAnimation(arg0-1, arg0, 0, 0);
 } else if (currIndex == arg0+1) {
  animation = new TranslateAnimation(arg0+1, arg0, 0, 0);
 }
 break;
 case 6:
 mPage6.setImageDrawable(getResources().getDrawable(R.drawable.page_now));
 mPage5.setImageDrawable(getResources().getDrawable(R.drawable.page));
 mPage7.setImageDrawable(getResources().getDrawable(R.drawable.page));
 if (currIndex == arg0-1) {
  animation = new TranslateAnimation(arg0-1, arg0, 0, 0);
 } else if (currIndex == arg0+1) {
  animation = new TranslateAnimation(arg0+1, arg0, 0, 0);
 }
 break;
 case 7:
 mPage7.setImageDrawable(getResources().getDrawable(R.drawable.page_now));
 mPage8.setImageDrawable(getResources().getDrawable(R.drawable.page));
 mPage6.setImageDrawable(getResources().getDrawable(R.drawable.page));
 if (currIndex == arg0-1) {
  animation = new TranslateAnimation(arg0-1, arg0, 0, 0);
 } else if (currIndex == arg0+1) {
  animation = new TranslateAnimation(arg0+1, arg0, 0, 0);
 }
 break;
 case 8:
 mPage8.setImageDrawable(getResources().getDrawable(R.drawable.page_now));
 mPage7.setImageDrawable(getResources().getDrawable(R.drawable.page));
 if (currIndex == arg0-1) {
  animation = new TranslateAnimation(arg0-1, arg0, 0, 0);
 }
 break;
 }
 currIndex = arg0;//设置当前View
 animation.setFillAfter(true);// True:设置图片停在动画结束位置
 animation.setDuration(300);//设置动画持续时间
 }

 public void startbutton(View v) {
 Intent intent = new Intent();
 intent.setClass(Viewpager.this,Viewdoor.class);//进入到开门效果的Activity
 startActivity(intent);
 this.finish();//结束本Activity
 }

}
下面再看一下导航Activity的布局文件,
在这里采用了Framelayout布局,因为这样就可以把开启我的维新生活Button以及下面的圆点一同显示在同一个页面上。这是一个小技巧,非常实用。导航页面完毕我们点击开启我的微信生活就会进入到一个大门效果的Activity,这也是一个动画效果。原理就是两张图片,分别朝不同的方向移动就实现了开门的效果。代码如下:
import android.os.Bundle;
import android.os.Handler;
import android.app.Activity;
import android.content.Intent;
import android.view.Menu;
import android.view.animation.Animation;
import android.view.animation.AnimationSet;
import android.view.animation.TranslateAnimation;
import android.widget.ImageView;

public class Viewdoor extends Activity {

 private ImageView mLeft;//往左边移动的图片
 private ImageView mRight;//往右边移动的图片

 @Override
 public void onCreate(Bundle savedInstanceState) {
 super.onCreate(savedInstanceState);
 setContentView(R.layout.viewdoor);

 mLeft = (ImageView)findViewById(R.id.imageLeft);
 mRight = (ImageView)findViewById(R.id.imageRight);

 AnimationSet anim = new AnimationSet(true);//动画集,一个类似于集合的功能
 TranslateAnimation mytranslateanim = new TranslateAnimation(Animation.RELATIVE_TO_SELF,0f,Animation.RELATIVE_TO_SELF,-1f,Animation.RELATIVE_TO_SELF,0f,Animation.RELATIVE_TO_SELF,0f);
 mytranslateanim.setDuration(2000);//设置动画时间
 anim.addAnimation(mytranslateanim);//添加动画
 anim.setFillAfter(true);//设置动画结束时停在结束位置
 mLeft.startAnimation(anim);//开始动画,下同。

 AnimationSet anim1 = new AnimationSet(true);
 TranslateAnimation mytranslateanim1 = new TranslateAnimation(Animation.RELATIVE_TO_SELF,0f,Animation.RELATIVE_TO_SELF,+1f,Animation.RELATIVE_TO_SELF,0f,Animation.RELATIVE_TO_SELF,0f);
 mytranslateanim1.setDuration(1500);
 anim1.addAnimation(mytranslateanim1);
 anim1.setFillAfter(true);
 mRight.startAnimation(anim1);

 new Handler().postDelayed(new Runnable(){
 public void run(){
 Intent intent = new Intent (Viewdoor.this,Main.class); //进入到主页面
 startActivity(intent);
 Viewdoor.this.finish();//结束本Activity
 }
 }, 1500);

 }

}
至此,关于微信的导航功能就介绍到这,比较重要的地方有,ViewPager的使用,小圆点动画效果的设置,也就是Tween动画要熟练掌握。下一篇将讲述微信主页面的实现,欢迎大家关注!
效果如下:
相关文章
- 离火之境官网和渠道服互通吗 官网和渠道服介绍 12-24
- 校友邦网页版登录入口-校友邦官网网页版登录 12-24
- 哔咔漫画安卓最新版下载-哔咔漫画免费高清版下载 12-24
- 艾尔登法环黑夜君临魔法师塔 魔法师塔全谜题点位一览 12-24
- 云原神网页版入口-米哈游官网原神云游戏直达2026 12-24
- 快手直播网页版官方入口-快手直播网页版官网直通车 12-24


