


最新下载
热门教程
- 1
- 2
- 3
- 4
- 5
- 6
- 7
- 8
- 9
- 10
Illustrator中威力无比混合工具使用经验技巧
时间:2022-06-28 20:06:45 编辑:袖梨 来源:一聚教程网
给各位Illustrator软件的使用者们来详细的解析分享一下威力无比混合工具使用的经验技巧。
教程分享:
illustrator中威力无比的混合工具(blend-1)
blend()是个很实用的功能,在渐变网格没出现之前,艺术家们用它作为渐变(即放射填充)的强力补充,并完成了很多意想不到的效果。不相信?ok!来看看这两个例子!
鞋带制作法
首先画一个圆,不必是正圆………
然后使用filter里的distort,(AI8没有,7和9都有…)交换一侧的上下点位置,如图…是不是很像个8,不过倒下了……扯远了.ok!ok!
接下来,使它无填充,笔划为60%左右的黑,然后,复制它,并使用粘贴到前面(edit--copy,edit--paste in front或ctrl+c再ctrl+f),这时选中的物体就是你刚粘贴上的,给它笔划0.5pt的值,再填充笔划为白色,如图

然后,选中它们俩,使用object里的blend--make,然后选择blend--option,出现对话框,选择specified steps,给它100步的值,点ok,效果如图(如何,是不是有立体感了。什么!你不选绘它步数也可以?那是平滑颜色啊,一般都是256步左右啊!你显卡好,内存大,不怕!?服你.)

然后,用旋转工具,旋转90度,同时按下alt键(复制),效果如图,

然后画一根路径(做鞋带头),同样颜色,但要迭中圆头形式,(如果作的strok面板中没有,请双击stork标签,到它弹出option为止),然后如法炮制,做出鞋带,镜像复制它,最后捎做修饰……(你可以使用filter中的corol中的adjust color来调整颜色达到满意的效果,记得选上convert和PReview哦!)

***** 看看下图,猜猜是怎么做的?

illustrator中威力无比的混合工具(blend-2)
怎么样,对blend是不是有了新感觉,不过…其实…嗯……其实有种很简单的办法可以实现类似的效果…看下面…
金属管(ai8.9)
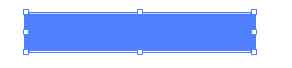
首先建立一个矩形,长方形的,选择渐变填充,笔划无。

顺着方向使用渐变工具,使它具有立体感。

选择它,object--expand--选中specify--255(这个命令是把当前物体变成最基本的属性--多个填充色块的物体。)ok!
由于expand在扩展物体属性的同时生成了一个路径蒙版 , 是不能成为笔刷(brush)的,我们选中物体,使用clipping path--relaese(释放蒙版)
然后我们把它直接拖进brushes面板,弹出对话框,--artbrush,好了。
使用这个笔刷,我们就可以直接画出钢管了。
illustrator中威力无比的混合工具(blend-3)
来自Illustrator7 stuio sceret的秘密技术--铬效果
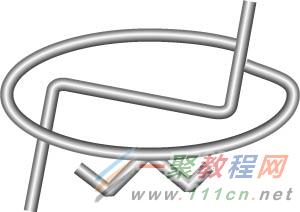
首先画一条类似的路径-定位点越多,效果越好

按alt键向下拖出一条路径,然后ctrl+d,ctrl+d……有八九条即可
全选,使用Distort--scribbleandweak,(水平值我是用的8%,垂直值是28%,你可以看着调整)
用直接选取工具(白箭头)调整各个点,避免路径重叠和产生环路,这一步要小心做,见下图
将每一条路径颜色变化,不宜色彩浓烈,在明度上有多些变化最好。
全选,并在stroke面板中选中圆滑转角,
用blend工具逐条混合(依次点击每条路径的尾端)ok。看看效果如何?


好了,以上的信息就是小编给各位Illustrator的这一款软件的使用者们带来的详细的威力无比混合工具使用的经验技巧解析分享的全部内容了,各位使用者们看到这里了,小编相信大家现在是非常的清楚了吧,希望小编上面给大家分享的信息能给大家带去有用的帮助。
相关文章
- 《弓箭传说2》新手玩法介绍 01-16
- 《地下城与勇士:起源》断桥烟雨多买多送活动内容一览 01-16
- 《差不多高手》醉拳龙技能特点分享 01-16
- 《鬼谷八荒》毕方尾羽解除限制道具推荐 01-16
- 《地下城与勇士:起源》阿拉德首次迎新春活动内容一览 01-16
- 《差不多高手》情圣技能特点分享 01-16